• The Cycling News forum is looking to add some volunteer moderators with Red Rick's recent retirement. If you're interested in helping keep our discussions on track, send a direct message to @SHaines here on the forum, or use the Contact Us form to message the Community Team.

    In the meanwhile, please use the Report option if you see a post that doesn't fit within the forum rules.

    Thanks!

The DIY thread

Page 16 - Get up to date with the latest news, scores & standings from the Cycling News Community.
I don't know what you mean by the anti-siphon ...
Main toilet problems are:
1) The tank slowly leaks into the bowl, and then the input valve opens and runs for a short time. The usual fix is to replace the 'flapper stopper' or the the 'drop down stopper'.
2) The input valve doesn't close and the water in the tank fills-up too high and runs down the 'overflow' tube into the tank. The water in the tank should be at least 1/2 inch below the top of the overflow tube. The valve assembly should have some way to regulate the height of the water. Old style has adjustment screws.
If you need to replace the valve, then the plastic 'FLOW MASTER' work quite well.

If you're not familiar with how the valve / float / stopper work - take pictures and take them to Home Depot and they'll get you the proper pieces.

To change the valve -
1) turn OFF the water going into the toilet and make SURE it's OFF by flushing and that no water goes into the tank.
2) remove the remaining water from the tank, by scooping it into the bowl, and then sponge to get the last bits.
3) have a bowl under the toilet supply line to catch the little bit of water when you unscrew the line.
4) unscrew the nut that holds the top of the LINE onto the bottom of the toilet. IF the line is solid metal tubing, then replace it with a flexible line (measure the distance and tell the guy at HD - you want the line to be a little long so it is easy work with. Don't try to reuse a solid metal tube - nothing but trouble ...
5) unscrew the big nut that holds the valve onto the bottom of the toilet.
6) install the new valve per the instructions on the package.

Jay
 
Re:

JayKosta said:
I don't know what you mean by the anti-siphon ...
Main toilet problems are:
1) The tank slowly leaks into the bowl, and then the input valve opens and runs for a short time. The usual fix is to replace the 'flapper stopper' or the the 'drop down stopper'.
2) The input valve doesn't close and the water in the tank fills-up too high and runs down the 'overflow' tube into the tank. The water in the tank should be at least 1/2 inch below the top of the overflow tube. The valve assembly should have some way to regulate the height of the water. Old style has adjustment screws.
If you need to replace the valve, then the plastic 'FLOW MASTER' work quite well.

If you're not familiar with how the valve / float / stopper work - take pictures and take them to Home Depot and they'll get you the proper pieces.

To change the valve -
1) turn OFF the water going into the toilet and make SURE it's OFF by flushing and that no water goes into the tank.
2) remove the remaining water from the tank, by scooping it into the bowl, and then sponge to get the last bits.
3) have a bowl under the toilet supply line to catch the little bit of water when you unscrew the line.
4) unscrew the nut that holds the top of the LINE onto the bottom of the toilet. IF the line is solid metal tubing, then replace it with a flexible line (measure the distance and tell the guy at HD - you want the line to be a little long so it is easy work with. Don't try to reuse a solid metal tube - nothing but trouble ...
5) unscrew the big nut that holds the valve onto the bottom of the toilet.
6) install the new valve per the instructions on the package.

Jay
To be honest Jay, I don't know what I mean by anti-siphon either. I just looked it up on the internets and that's what it told me the part is called.

I'm trying to replace the internal works of the toilet tank not because anything is leaking, but because it just doesn't seem to be working/filling with water properly. I got one of those universal toilet repair kits, so far I find the instructions to be very confusing.

I'm getting very frustrated right about now... maybe I just need to walk away from it and give it some deeper thought.

PS - I definitely did turn off/disconnected the water supply and had drained the toilet tank before I started messing around with this, this much at least I do know.
 
YouTube is probably your bet DIY info source.

If the old parts in the tank look significantly different than the kit you bought, it's still fine.
Old style has a 'float ball' that attaches to the valve via a metal rod (about 8 inches). The new style doesn't have the float ball, the upper part of the valve itself is the float, and the height of the water in the tank is adjusted by extending the plastic 'support base' of the valve - it usually moves in 'clicks' by pushing it up/down (read instructions ...).

'Not filling with water' could mean the old valve is stuck closed and isn't allowing new water in.
OR if new water is coming in, then the 'flapper stopper' or 'drop stopper' is not sealing correctly and is preventing the tank from filling. The usually suggestion is 'jiggle the handle' to get the stopper seated properly. If the stopper is old then it might be too stiff or cracked to seal properly. Some times the rod that attaches the handle to the stopper mechanism gets bent or twisted and prevents the stopper from dropping down directly over the hole into the bowl. I've had very good results by buying the ~$15 (as opposed to $3 cheapie) handle. The expensive handle is sturdy all metal, and the handle itself is very nicely finished. NOTE the nut that attaches the handle to the tank has reversed threads - clockwise loosens, counter-clockwise tightens - very firm finger pressure is all that is usually needed for tightening.

Jay
 
The new toilet stems are available at HD or Lowes..it's really easy..turn off the supply valve..flush the toilet..look down into the tank..look and listen to make sure the shut off is working..no water should be flowing to refill the tank..
*take the tank lid and put it in another room!! Don't put that ceramic tank cover anywhere in the bathroom! It can break east if it slips and falls..
After that you are going to look at the old one..take a picture if you need..the new part threads into the bottom of the clean water tank..there are rubber seals that go in easy and as long as you don't over tighten you are good..while you are in there spend the 2-3 bucks for a new flap..
The bolts holding the tank on the toilet are good..don't need to be tightened.
You need to be able to see clearly all holes on the bottom of the tank..maybe need a flashlight and some dry newspaper..as the tank fills after you turn on w fill up valve you need to check for leaks..you can hold a dry newspaper under your work area..usually if a leak is not totally obvious to you water dripping on the newspaper is easy to see..
Main challenge is getting your hands in and around the toilet because they are usually close to the wall(s) and that bathrooms are small spaces..
Channel locks or Vise Grips w a wide travel on the jaws..most bezel nuts can be hand tight 80% of the way
 
Thanks for the tips, guys, I'm happy to report I was able to fix not just one, but two toilets successfully. No leaks anywhere - yay!

I ended up just replacing the fill valve on one and the anti-siphon ballcock on the other because that was all that was truly necessary, the biggest pain was draining the toilet tanks. (They say get a washcloth ready to pick up any extra water, I say get a whole damn bucket and a mop ready for the cleanup!)

Anyhoo, this is yet another DIY project that has been completed successfully by yours truly, I would have just hated having to spend a small fortune on a pro plumber.

PS - Not sure I fully understand the basic principles of how toilet plumbing actually works, but once I got my hands on some parts that make it work it became very interesting. :cool:
 
Here are some updates on my latest DIYs (cause I know you guys have just been dying for them), first off, the '67 Bug. Picture this...

I'm driving home and suddenly I hear this bizarre sound. Being the car is so old I thought maybe a door had fallen off, or maybe I had lost the engine, turns out it was the fan belt. Thankfully I got home without any major damage to the engine, the fan belt was just shredded, though. So naturally I wanted to fix this myself...

Went to an auto parts place where they sell fan belts that are supposed to fit the '67 Bug - bought one, tried to install it, turns out it was too short. Hmpf! So I ordered one from Amazon that got good reviews from old VW owners, it's supposed to arrive on Monday. We shall see. If nothing else I got to practice how to change and adjust the fan belt being I've never done it before, in these old Bugs the adjustment is rather ingenious. (It involves some shims, god bless those Germans.)

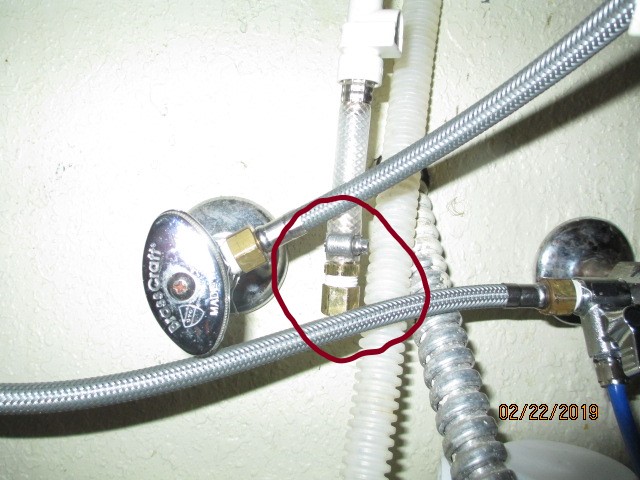
Next DIY I was not able to tackle... the old washer started leaking water all over the place, upon checking the webs I learned it could be a whole number of things. Being I can barely move the washer in order to get to the back panel I just said *** it and chose to buy a new one instead. Think I got a good deal on a decent washer - with delivery and warranty and hauling the old one away it came to about $500.

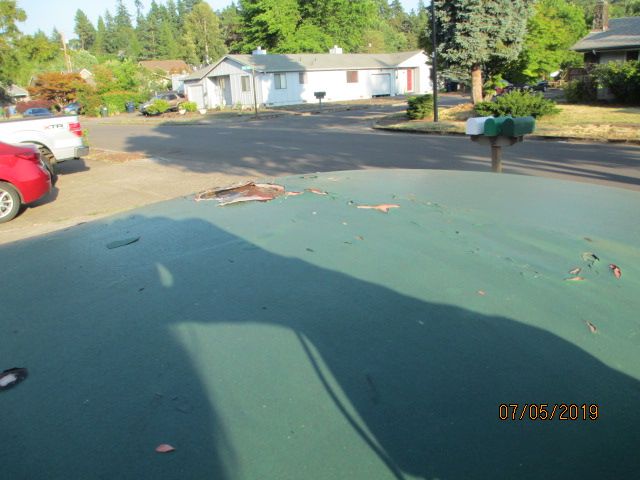
Last but not least this DIY was a success (well, sort of) - my bike repair stand + tools has to stay outside on the patio, being I didn't want my tools to get all wet and rusty from the rain I've been using a yard debris bag to cover the stand. After a few years the bag was just totaled, so I wanted to sew one together with any stuff I already had.

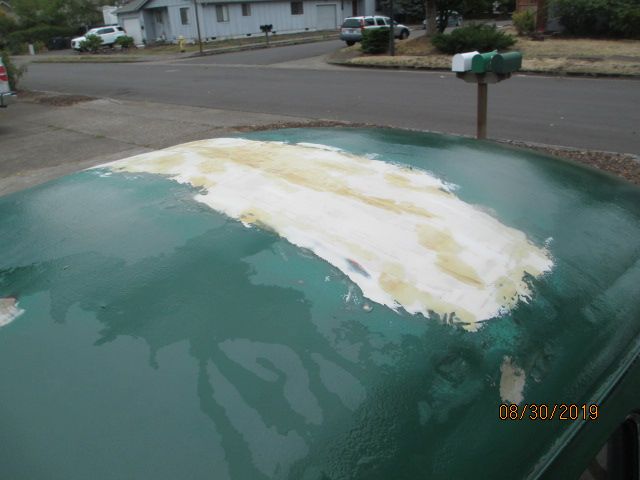
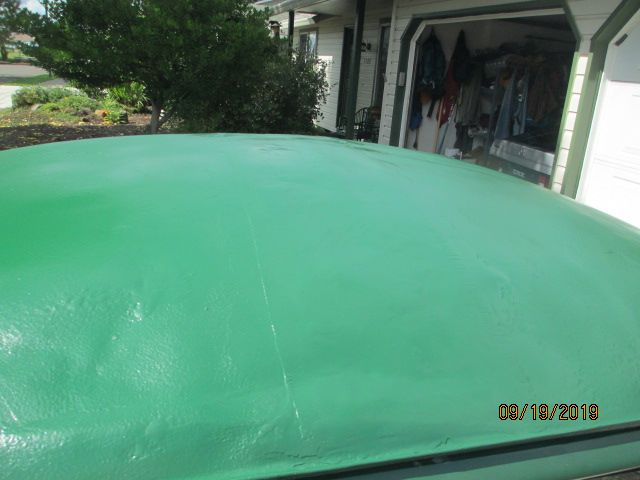
I ended up using an old bed sheet, a plastic shower curtain liner, some bamboo stakes, staples, and a sewing machine. I was just making it up as I went along, trying to sew a plastic liner to the bed sheet was quite the adventure. (Don't think I want to try that again.) It doesn't look as nice as I had hoped, but as long as my stand and tools stay dry I don't really care.

So here's a picture of the old yard debris bag and my latest creation - personally I think it's a freaking masterpiece!
leaf-bag1537642133.jpg


Will keep you all posted on the fan belt situation once the belt arrives, worry not.
 
The VW fan belt probably also drives the generator/alternator, so make sure that the pulley for it (and also the fan itself) spins freely and doesn't feel like the bearings are loose/wobbley. If bolts/nuts are rusted use penetrating oil or 'PB Blaster' (from HD or Lowes). The belt might have just broke due to age, but if the fan/generator pulley isn't turning correctly, that will cause the belt to wear much more quickly.

The 'tool cover' looks great!

Jay
 
If anyone here knows about camp trailer roof coatings...please enlighten me. I just got a 1990 trailer from an elderly couple..the thing is in great shape. Nothing adulterated..pretty much stock..there are some tiny marks from water..I want to caulk and seal the roof ASAP...we have not had any measurable rain but I want to hurry and address this..I looked to YouTube but way too many products!!!and procedures!!22ft so it should be pretty easy...I hope
 
I'd call an RV dealer that handles used ones, and ask them.
For small leaks in a metal roof shed, I used 'roof sealant' (basically black tar goop) from the roofing section in Home Depot. It came in a caulk tube, and is used primarily for sealing around the penetrations in a roof - e.g. vent pipes, flashing around chimney, nail holes, etc.

Other option might include Plumbers GOOP.

For best appearance, maybe cut small patches from similar color aluminum siding, and use waterproof adhesive to attach it.

To coat the entire roof, maybe 'bed liner coating' that is used for pickup trucks.

With any coating or adhesive, be sure the surface has been cleaned of any grease, etc.

Jay
 
Re:

JayKosta said:
The VW fan belt probably also drives the generator/alternator, so make sure that the pulley for it (and also the fan itself) spins freely and doesn't feel like the bearings are loose/wobbley. If bolts/nuts are rusted use penetrating oil or 'PB Blaster' (from HD or Lowes). The belt might have just broke due to age, but if the fan/generator pulley isn't turning correctly, that will cause the belt to wear much more quickly.

The 'tool cover' looks great!

Jay
Thank you for the tips, Jay.

Think the hardest part for me fixing the Bug this time around was actually identifying which part, exactly, I was trying to fix. In all of those youtube DIYs they called it something different - it's a fan belt! It's a generator belt! No, it's actually an alternator/generator belt! Or, perhaps, it may be both, or all of the three above?!

Am pretty sure it's all of the above, so I ordered some extra shims (which are nothing more than really huge metal washers), and voila! With just adding one I think I am happy with the tension of the "all of the above" belt.

To be honest, I'd rather have the belt .5mm too loose than .5mm too tight, the latter may just shred the ball bearings on the fan/alternator/generator... this kind of part I'm not prepared to replace yet.

Anyhoo, thanks again! :)

PS - What the heck does the alternator do? I know I'm supposed to know this, but just haven't gotten around to researching it yet.
 
Alternator is just the more modern replacement of the generator. Older cars (e.g. 50s and earlier) usually had generator, more recent have alternator. Generator produces only DC current, alternator produces AC which goes thru circuitry to output DC - they both are used to keep the battery charged.

Jay
 
The alternator is the part that shuts your fuel pump and lights off at midnight, in the middle of nowhere, in below zero temps...sorry, I'm reliving a bad drive home from many years ago.

The question is, is there a reliable test to let you know that they are close to death? The answer seems to be no.
 
Re:

jmdirt said:
The alternator is the part that shuts your fuel pump and lights off at midnight, in the middle of nowhere, in below zero temps...sorry, I'm reliving a bad drive home from many years ago.

The question is, is there a reliable test to let you know that they are close to death? The answer seems to be no.
Oh dear, that doesn't sound like fun. What was the weather like at the time? (Would hate to be stuck in the snow or rain in the middle of the night somehwere.)

I've certainly had plenty of experiences with the Bug... one time the horn started honking each time I was signalling to make a turn. It was kinda embarrassing. I just had the horn disconnected because the mechanics apparently didn't know how to or didn't have the parts to fix it, no biggie, each time some other driver pisses me off I just shout obscenities at them instead. Maybe I should get a bullhorn so I can make my point that much louder and clearer...

But seriously, I have no idea how far along the alternator is, like you I may have to find out the hard way.
 
You might have a 'voltage gauge' or 'battery idiot light' on the dashboard. If there's a gauge, just look at it occasionally to see that the needle is in the 'charging' range - usually about 13 volts for cars with 12v battery.

Car batteries typically give a warning about something being wrong --- usually a very worrisome but successful slow cranking of the starter motor and then the car starts. DON'T ignore it - it's given you its one-time warning! If you do have 'battery problems', always park so that getting a jump start is possible. Repair shops will usually test the generator/alternator as part of doing a battery replacement - ask them to be sure.

Jay
 
It's been a while since I've done a DIY, this one was a headache because I had to improvise and make three separate trips to Home Depot. (Don't you just hate it when you get the wrong parts and then have to go back and exchange them? Ugh!)

Anyhoo, being I hate the taste of chlorine and was tired of the flimsy Britta screw-on faucet filters I wanted a dedicated faucet that provides cold, filtered water only, I chose to go with this product. The selection was easy, but naturally I ran into problems during installation.


The current kitchen faucet comes with a separate vegetable sprayer, it didn't even occur to me that you couldn't just remove the sprayer because the main faucet is unapologetically linked to the sprayer. So after consulting with the Home Depot guy I was told I'd either have to find a way to cap the sprayer hose, or to just buy a whole new faucet. (Which I wasn't about to do.) So...

Being the sprayer hose was a quick connect (why couldn't it just have been a screw on?), I had to buy a barb something or other valve and a cap, and one of those ring thingies you can tighten (I don't know what things are called, grrrr...), so far it seems to be working okay. It's only a $8 fix, and if it doesn't hold due to the high water pressure I will have to buy a new faucet afterall. (That one would naturally not come with a separate sprayer because I wouldn't be using it.) Here's what it looks like under the sink.


I'm also planning on replacing the cold water shutoff valve because the old one is leaking a bit, now I just have to find the main water valve so I can shut the water off completely while I'm replacing the kitchen faucet valve.

So yeah, adventures in plumbing - they're irreplaceable!
 
I would first like to thank the engineers at Yamaha motorcycles. I did plugs,air filter, cleaned air box enclosure and replaced final drive oil. 1200cc two cylinder..the thing is a Rubics cube..the plastic all needs to be removed..the 5 gallon gas tank needs to be unhinged and put in a 90degree up position for maintenance. The air box sits under the tank..it has to be completely removed to gain access to the top of the cylinders and each of the spark plugs is @4inches deep.w a waterproofing cap cover that keeps everything out.
All of us know that the tool kits that come w cars and motorcycles are usually a disappointment and all too often useless.
Yamaha included a couple of tools that make everything pretty easy..and possible wo screaming and killing anybody.
My mood is more foul than normal because the Baja 500 start has moved to Esterollo Beach. @20-25 mins..but more a down kick is the race route is changed and will no longer be near my house..and it's probably permanent because of some road improvements that are near completion.
I will ride tomorrow and try and get a decent viewing point..previously I could bring my dogs, friends food and beer and booze. All w lawn chairs..w @2-3 minutes drive including parking..
Saturday will be coffee and baked goods and riding the motorcycle for ease of parking and avoidance of traffic..
I hope to notice performance improvements because the plugs were all in fouled shape..and scary the lack of much if any torque...? All spark plugs were waaaay too easy to remove!!
Borrowed a decent torque wrench and will blame Harbor Freight for girls discovery.
 
It's been a while since I've done a DIY that required hard work and effort, so having said that, it's that time of the year again, yes, it's time to redo the VW Bug's roof again.

My prior effort from a few years back blistered and peeled off in the heat and the sun...


... so this time I'll be using different auto body fillers. I'll still be using the Bondo body filler, but I'm also applying several coats of fiberglass filler and mesh, can't wait to see how this turns out.


While they harden very quickly and you have to work fast I don't mind the fillers, but the sanding, lordy almighty how I loathe the endless sanding. Naturally I will keep you all posted once my masterpiece is done, worry not.

PS - Has anyone heard from Jay Kosta? He was always so cool and informative with DIYs, haven't seen him around in ages. Hope he's ok.
 
At last, and I know this is the moment you have all been waiting for, my Picasso is finished! Well, for this summer anyway.

Being it's already started raining I had to work around the weather, but so far the fiberglass resin looks very promising. It still looks like crap, but as long as I don't have any roof leaks I'll be pleased.


On a completely unrelated note - I ruined the velcro on my Copperfit ™ (cause Brett Favre wears it, heh) back brace when throwing it in the wash, found a very useful tip on the webs on how to restore it. Seeing as I had a steel brush laying around I just used it to clean all the lint off the velcro, it worked very well. So yeah, that's just an FYI I wanted to pass along.
 
  • Like
Reactions: jmdirt
Does anybody know how to clean(neutralize) the inside of plastic bags that dispense laundry and dish washing detergent?
I see similar heavy plastic bags for sale in REI,A16 and Amazon. I would want to use them for food items while camping. I have tried water, and some vinegar..but can't seem to shake the soap taste.
* Don't ask how I know that the bag interiors still have soap flavor!!!*
Polident?
 
Does anybody know how to clean(neutralize) the inside of plastic bags that dispense laundry and dish washing detergent?
I see similar heavy plastic bags for sale in REI,A16 and Amazon. I would want to use them for food items while camping. I have tried water, and some vinegar..but can't seem to shake the soap taste.
* Don't ask how I know that the bag interiors still have soap flavor!!!*
I would think since it's plastic the scent might have permeated it so much that there is no way to get the stink out. But I don't know, have never tried it.

This following webs tip says you should spray the bag with vinegar (which you've already tried), but then you're supposed to add baking soda to additionally absorb any odors.
  1. Fill a spray bottle with white vinegar and mist over the bag, both inside and out. Allow the bag to air dry.
  2. Sprinkle baking soda inside the bag and let sit overnight to absorb any excess odor or moisture.

If you try this let me know how it goes!
 
Just for the ridiculous lack of fun in life a girl sometimes has got to do what a girl's gotta do!

In this case I had to replace the starter/pull cord on my Honda lawnmower - the old one broke, so I just consulted the latest DIY vid on youtube on how to replace it.
View: https://www.youtube.com/watch?v=CVKpgybovtc


By sheer luck I had some kind of a ropy thing at home that was long enough (not a shoe lace), it seems to be working okay so far. It seems to be able to handle my fierce pull when I initially start the lawnmower without breaking, so that's cool.

My biggest pride and joy was fixing up the grass collection bag, though (which had been eaten through by rodents, or some such), with some duct tape. (If you don't know how to work with duct tape I don't even wish to speak to you.)


So yeah, this is my latest DIY on less than a dime - what's yours?
 
Last edited:

TRENDING THREADS